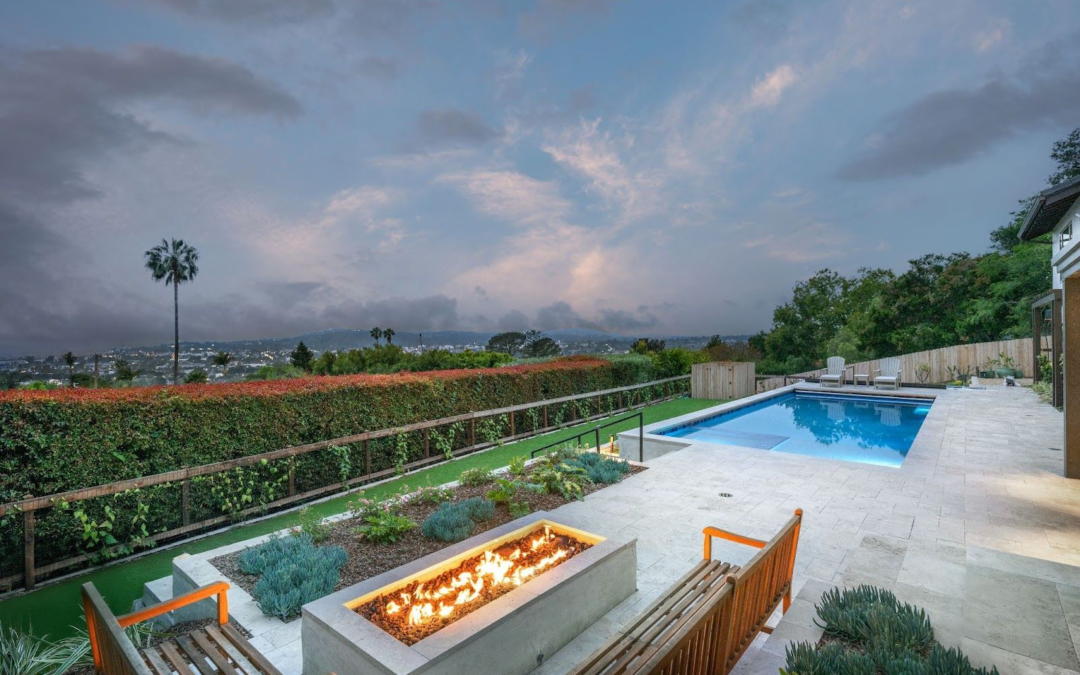
How long does it take to build a pool? It is one of the first questions homeowners ask when they begin planning a new pool. Understanding the pool construction timeline can help you know what to expect from the initial consultation through the final walkthrough.
A custom residential pool can take several months from the beginning of the planning process to completion. Design decisions, engineering, permits, site conditions, inspections, materials, and the complexity of the project can all affect the overall schedule.
A pool construction timeline includes much more than the days spent actively building the pool. Here are seven essential stages to understand, from the first design conversation through the final details.
1. Start With the Initial Consultation
Before construction begins, the first step is understanding the property and what you want to create. A pool project starts with a conversation about how you plan to use the space, the type of pool you have in mind, your property, and the features you may want to include.
A site visit is also an important part of the early pool construction timeline. The pool builder can evaluate the yard, available space, access, existing landscaping, views, grade changes, and other conditions that may influence the project.
This early stage helps establish the direction for the rest of the project. It is also when homeowners can begin thinking about the pool’s relationship to the house and surrounding outdoor spaces.
Understanding the pool construction timeline starts with recognizing that there is substantial planning involved before construction equipment ever arrives.
2. Develop the Pool Design
Once the property and project goals are understood, the design process begins. This is where the pool’s shape, size, placement, features, materials, and relationship to the surrounding landscape are developed.
Depending on the property and project, the design may include features such as a spa, tanning ledge, water features, lighting, fire features, or automation. Outdoor living elements can also be incorporated into the overall plan so the pool feels connected to the rest of the backyard.
Fluidity creates detailed plans and 3D renderings during the design process, allowing homeowners to understand how the finished project will come together before construction begins.
A well-developed design can also help keep the pool construction timeline more organized. Making important decisions early gives the construction team a clear plan to follow.
The design phase is an important part of the overall pool construction timeline because it establishes many of the decisions that will guide the construction process.
3. Complete Engineering and Permitting
After the design is finalized, the project moves into engineering and permitting. These steps are essential to making sure the pool is designed and constructed according to applicable requirements.
Engineering requirements can vary depending on the property. Soil conditions, elevation changes, structural requirements, drainage, and other site characteristics may all need to be addressed before construction can begin.
Permitting timelines can also vary by location. The local building department determines its review process and schedule, so this portion of the pool construction timeline is not always predictable.
Fluidity handles engineering, permit applications, local building department coordination, and required inspections as part of its pool design and construction process.
4. Prepare the Property for Construction
Once the necessary approvals are in place, the property can be prepared for construction. This includes coordinating access, confirming the pool layout, preparing the work area, and making sure the construction team can safely move equipment and materials onto the property.
Access can be particularly important on properties with narrow driveways, limited backyard access, steep terrain, or existing structures that need to be worked around.
Careful preparation at this stage helps establish the conditions for the excavation and structural work that follow. It also gives the team an opportunity to identify potential site challenges before they interfere with later phases.
Planning for this stage early can help homeowners coordinate landscaping, outdoor furniture, and other improvements around the pool construction timeline.
5. Complete the Structural Construction
Excavation is one of the most visible moments in the pool construction process. The approved pool layout is transferred to the property, and the excavation team removes the soil to create the shape and depth of the pool.
The amount of time required can vary based on the size and shape of the pool, access to the property, soil conditions, and the complexity of the site.
After excavation, the structural framework and systems that support the pool are installed. Steel rebar provides structural reinforcement for the pool shell, while plumbing and electrical systems are positioned according to the design.
Plumbing may include circulation lines, drains, returns, and connections for features such as spas, water features, or other pool equipment. Electrical work supports pumps, lighting, automation, and other systems.
These systems are installed before the pool shell is formed, so their placement needs to be carefully coordinated with the overall design.
Excavation is only one part of the pool construction timeline. Much of the important work happens behind the scenes before the pool begins to look finished.
6. Form the Pool Shell and Add the Finishes
For a gunite pool, the next major stage is applying gunite over the steel framework to create the structural shell. The gunite forms the walls and floor of the pool according to the approved design.
Once the shell has been applied, it needs time to cure before the project can move into subsequent finishing stages. Fluidity’s current construction process allows approximately 30 days for the gunite shell to cure.
This curing period is an important part of the pool construction timeline and should not be treated as wasted time. The shell is developing the structural strength needed for the finished pool.
After the structural work has progressed, the project begins to take on its finished appearance. Tile is installed along the waterline, coping is placed around the pool’s edge, and decking or surrounding hardscape is constructed.
These materials have a major influence on the final appearance of the pool. Tile, stone, concrete, pavers, and other materials can be selected to complement the architecture of the home and the surrounding landscape.
Accounting for these necessary construction and curing periods gives homeowners a more realistic understanding of the pool construction timeline.
7. Complete the Interior Finish, Startup, and Final Walkthrough
Near the end of construction, the interior finish is applied to the pool. Fluidity offers options including plaster, pebble, quartz, and tile finishes, depending on the project and homeowner preferences.
After the interior finish is complete, the pool can be filled and the equipment started. Water chemistry is balanced, circulation systems are checked, and the pool’s equipment is tested to make sure everything is operating as intended.
The final walkthrough is the last step in the pool construction timeline. At this point, the builder reviews the completed pool and surrounding work with the homeowner.
Equipment operation, controls, maintenance requirements, and other important details can be explained so the homeowner understands how to use and care for the new pool.
Fluidity includes a final walkthrough as part of its construction process and remains available after completion for questions about equipment operation and maintenance.
What Can Affect a Pool Construction Timeline?
Even when a project is carefully planned, several factors can influence the pool construction timeline. Every property and project has different conditions, so construction schedules should be treated as project-specific rather than guaranteed.
Some of the factors that can affect the timeline include:
- Design complexity and the number of features included
- Property access and site conditions
- Engineering requirements
- Local permitting and plan review
- Required inspections
- Weather and site conditions
- Material availability and selections
- Changes made after construction begins
- Additional hardscape or outdoor living construction
- Coordination with other work happening on the property
Complex properties may require additional planning, engineering, or construction coordination. A pool with an attached spa, extensive hardscape, custom water features, or challenging site conditions may take longer than a more straightforward project.
For this reason, the pool construction timeline should always be based on the specific scope and conditions of the project rather than a standard number of weeks.
Why the Full Timeline Matters
One of the most important things homeowners can understand is that pool construction does not begin when the excavator arrives. The project has already gone through consultation, design, revisions, engineering, permitting, and scheduling before construction starts.
Fluidity currently estimates that straightforward residential pool projects typically take approximately three to six months overall, with more complex projects taking longer. Permit timelines can vary significantly by location, and design work typically takes two to four weeks.
Understanding the full pool construction timeline can make it easier to plan around other home improvements, landscaping, entertaining plans, and the time of year you would like to use your finished pool.
Rather than focusing only on the number of weeks required for construction, it can be more helpful to consider what needs to happen before construction, what happens during each phase, and which parts of the schedule are most dependent on the property and local approvals.
Plan Your Pool Project From the Beginning
A successful pool project is built around more than a construction schedule. The design, engineering, permitting, materials, equipment, landscape, and outdoor living areas all need to work together.
That is why the planning phase is so important. The more clearly the project is defined before construction begins, the easier it is for the construction team to work from a coordinated plan.
For homeowners planning a new pool, the most useful approach is to view the pool construction timeline as a complete process. A straightforward project may move differently from a large estate pool, a hillside property, or a backyard that includes extensive outdoor living improvements.
Understanding the pool construction timeline can make the entire experience feel more predictable and easier to plan.
Fluidity Pool Designs manages the process from initial consultation through design, engineering, permitting, construction, equipment installation, and final walkthrough. Our luxury pool design and construction approach brings the design and building process together so each phase is considered as part of the finished project.
If you’re considering a new pool, exploring the Fluidity portfolio can also help you see how different properties, layouts, materials, and features come together in a completed project.
Ready to start planning? Contact Fluidity Pool Designs to discuss your property, timeline, and vision for your new pool.
Ryan Clow, Owner
Fluidity Pool Designs
805-669-1200
[email protected]
Dive Into More Design Ideas
How to Choose the Right Pool Lighting for Your Backyard
Your pool doesn’t disappear when the sun goes down. In fact, the right pool lighting can completely transform how your backyard looks and feels at night. Thoughtfully placed lights can highlight architectural details, improve safety, create a relaxing atmosphere, and...
9 Pool Features That Can Transform Your Backyard
The right pool features can transform a backyard from a place to swim into a complete outdoor environment. The best features are not simply added for appearance. They can improve how you use the pool, create a stronger connection between the pool and surrounding...
Pool Design for Pacific Palisades Homes: Working With the Landscape
Pacific Palisades pool design begins with the landscape. Canyon properties, hillside lots, coastal-adjacent homes, established landscaping, and expansive views all create opportunities that can shape the way a pool fits into the property. Rather than treating the pool...